
Gluten Free + Vegan Soft & Fluffy Italian Bread
With eggs costing a small fortune lately there’s no better time for me to dive into learning to master egg free breads which I have been wanting to hone in on for awhile.
The key to success in making a great egg free/ gluten free + vegan bread is Psyllium Husk, Which is an ingredient I have been wanting to experiment with but felt a little overwhelmed knowing there would be a big learning curve and a lot of trial and error. I had tested it out a number of times and felt as though it was actually preventing my breads from getting as big as I knew they could be.
Turns out I was making one mistake.. I wasn’t adding enough hydration to my bread doughs when I used it. The cool thing about psyllium is that it allows you to sneak in a lot more water into the recipe without the dough getting super wet. Typically with gluten free bread recipe development I’m walking the fine line between getting as much hydration into the dough as I can while also making sure the dough can be worked with and shaped.Psyllium provides the structure to bread that it needs very similar to how gluten works. It allows allows for more moisture which means the bread gets bigger. Its kind of a miraculous ingredient when used correctly. I’m finding it also allows for recipes to contain less ingredients. It really opens the door to a new frontier of innovation & I’m really excited to go down the path and see what I can create.
The Psyllium + Xanthan Gum & Potato Flour in Better Batter + the Expandex that I like to add in is my personal magical combination to creating REAL deal bread. The expandex is what makes the dough really explode open in the oven & it gives is that real bread texture and look that I haven’t seen another ingredient make happen.
Psyllium is a really unique ingredient that has properties to it that I have not found in any other ingredients besides gluten itself. So I don’t think (at this time) anyways that I can recommend a way to substitute it successfully.

Psyllium really did wonders for the recipe. It makes the dough easy to work with & it allowed me to reduce the amount of steps substantially. The trickiest part really is shaping the bread without over working it & adding too much flour to it. Don’t stress over your bread looking perfect. That will come with time. The main goal to get started I think anyways is for it to taste good. Which will be the case so long as you follow the exact gram measurements and directions :). Using too much flour will prevent an “oven spring” from happening.
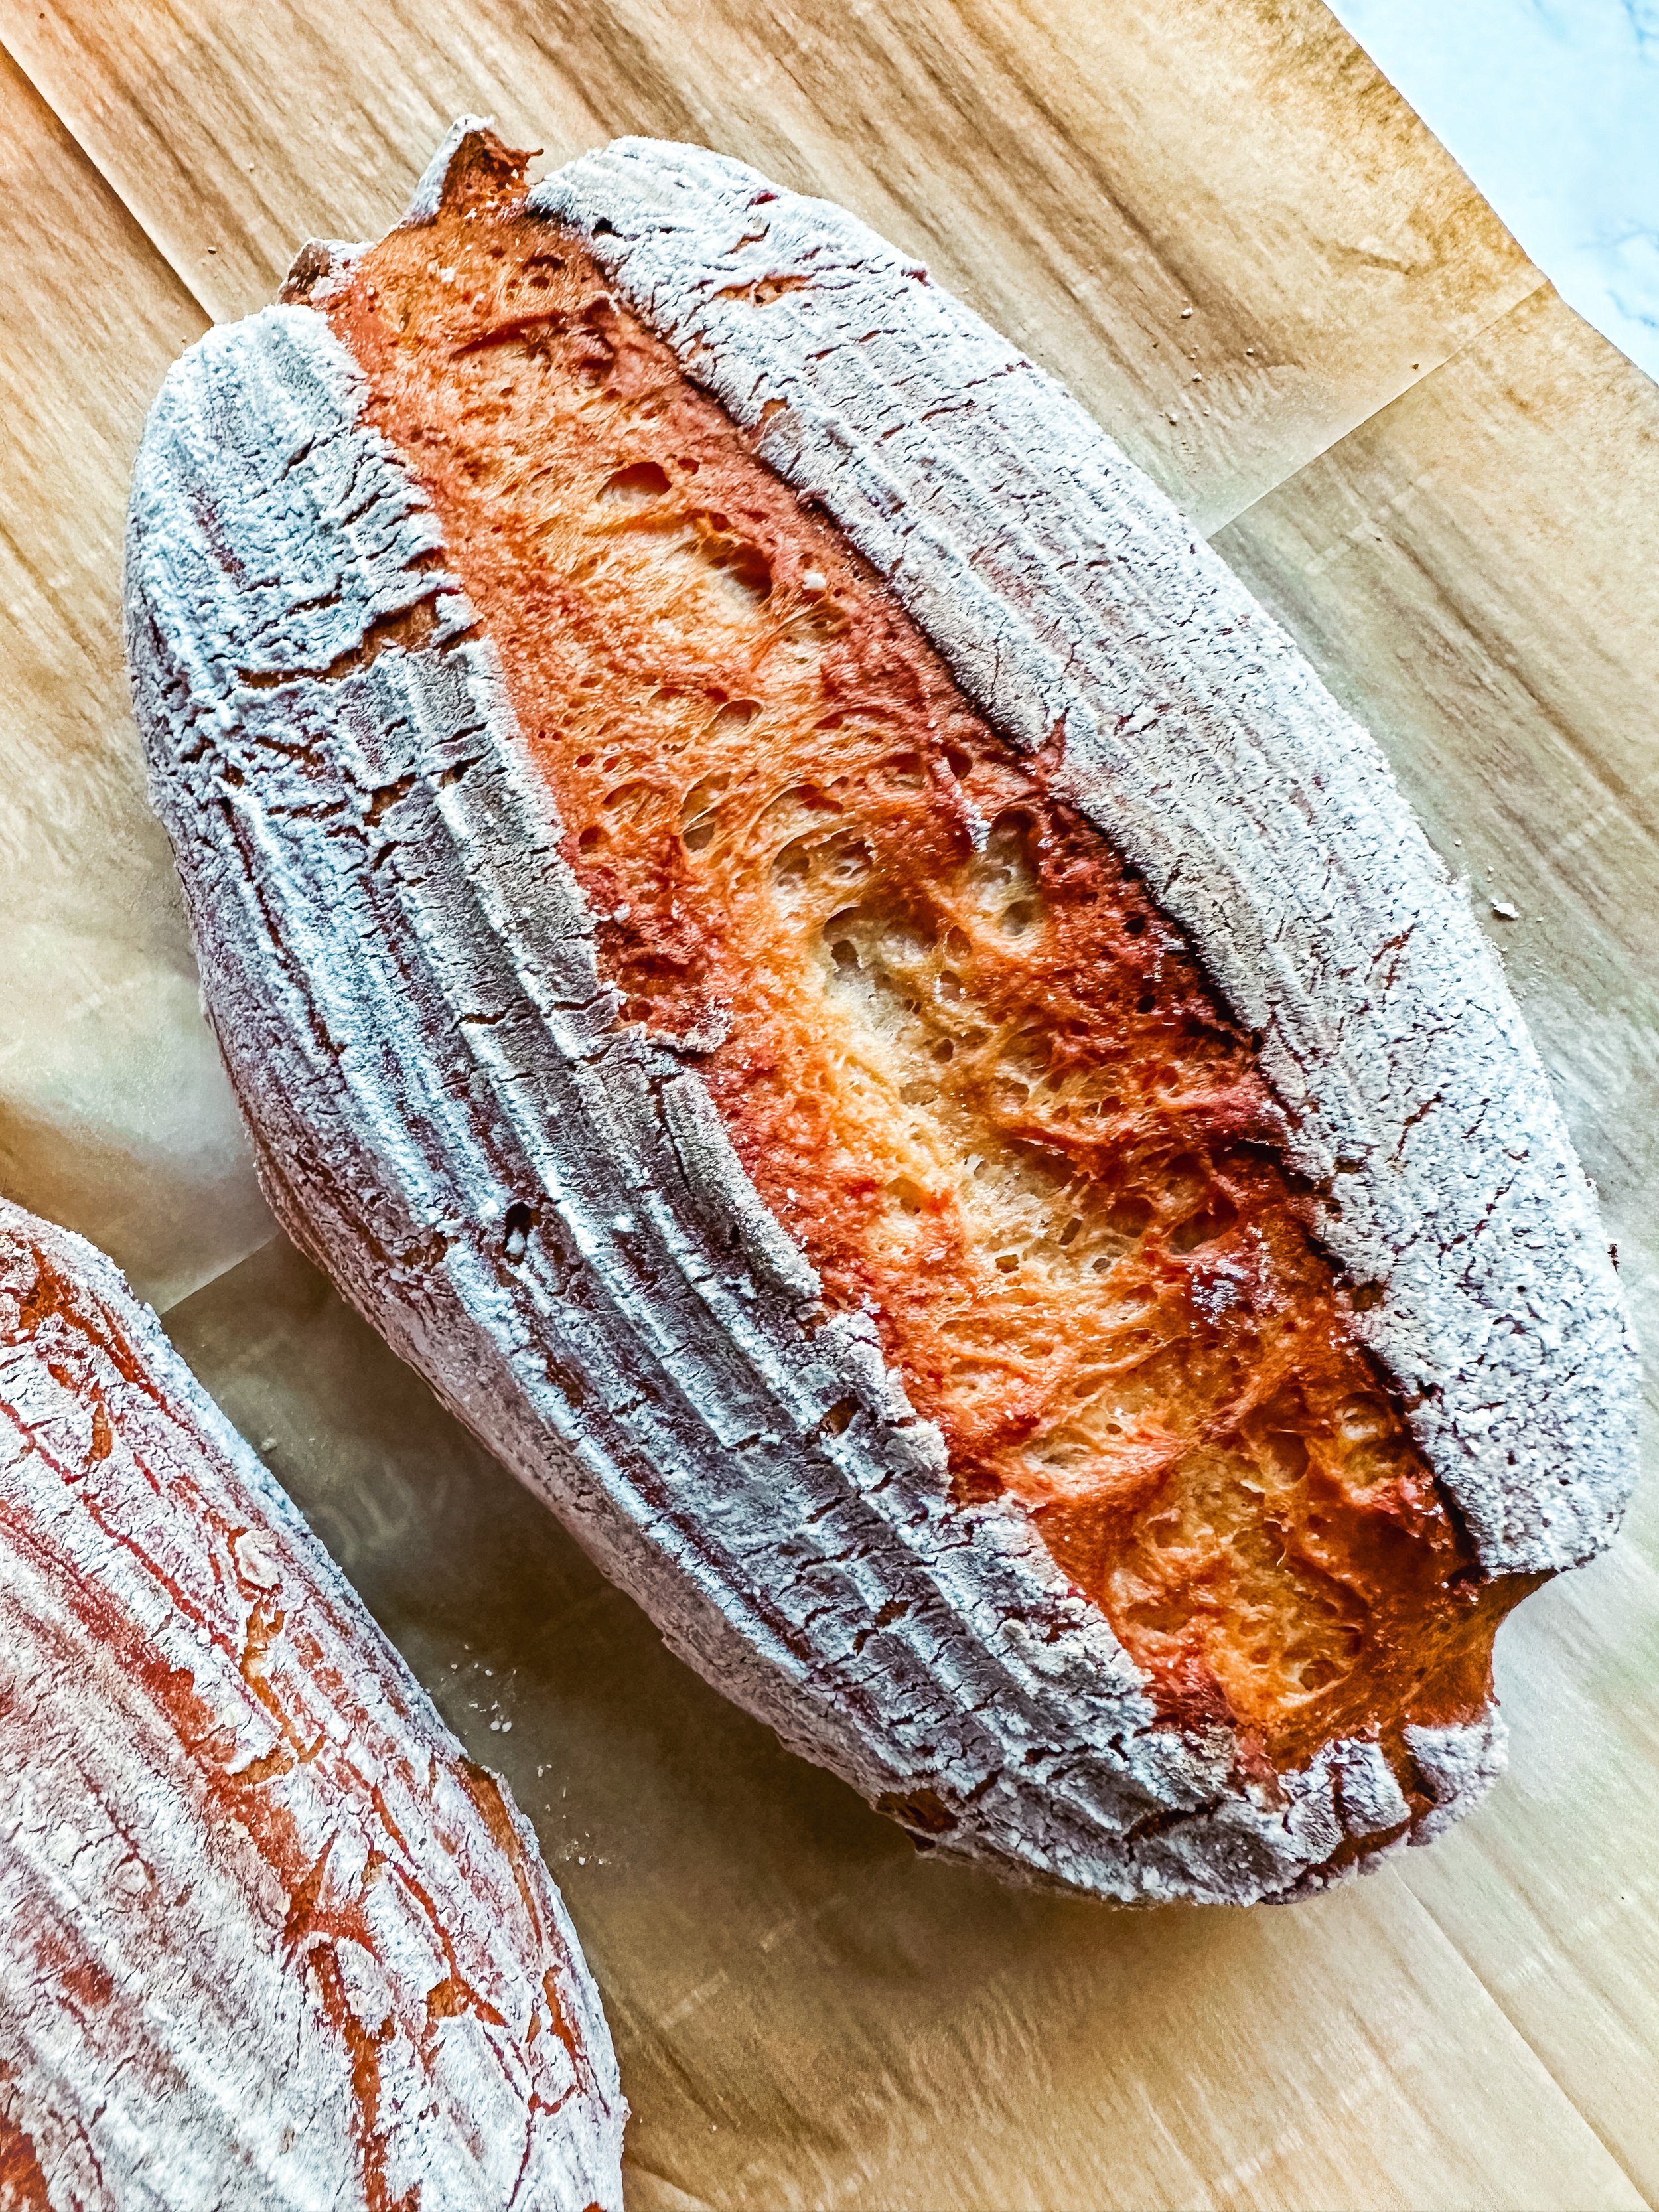
For this recipe you will need bread baskets! I used 10 inch Oval Banneton Proofing Baskets ( a set of 2)
https://amzn.to/3Zs0f9L. <—- I purchased this set on amazon!
You could also get away with using two 10 inch round banneton proofing baskets (or 1 of each shape!) I opted for oval since Italian bread typically comes in that shape & size.

Have you ever heard of the term oven spring?? Unless you are a baker then probably not.
Oven spring is a magical thing that happens in the oven that bread bakers aim for. IF there is enough hydration and structure in the dough and you put the dough into a very hot oven (preferably on a pizza stone or baking steel) then the moisture in the dough quickly bubbles up and creates a lot of height in the bread in the first 10 minutes in the oven. This then equates to a fluffy bread with a beautiful crumb & lots of perfect air bubbles. Even without an oven spring happening the bread will still taste good .. it’ll just be a bit dense in comparison. I discovered that mixing in too much flour when shaping the dough prevented the oven spring from happening because it reduced the amount of moisture in the dough. This is why I suggest trying to shape the dough using only a few tbsp of flour at the most.
Ingredients (Some of these are affiliate links that earn me a few cents if you shop using them! :)
Better Batter Gluten Free Orginal Blend
This flour blend continues to amaze me. It can do so many things better than most other blends that I have tried. As a result its extremely popular. Around the holidays it tends to sell out everywhere. Usually its available on Amazon and at Walmart. Lately I have been ordering it from the Better Batter website directly. When they sell out- they tend to restock pretty quickly. Check back within a day or two if they are sold out when you look. I buy it in bulk now (Up to 40 lbs at a time) as I cant risk running out. I use it in too many recipes that we love.
What if you cant get your hands on it? This may be the case if you live outside the US. My friend Nichole from Gluten Free on a Shoestring has figured out a mock recipe for better batter. Her version should work great in this recipe! The owner (Naomi) of better batter has confirmed that the mix is similar to the official version.
Better Batter so kindly offered me a 30% off promo code to share with all of you! This can be used as often as you would like for every single purchase made directly on BetterBatter.com Use the code: BakingAngell30
Expandex
This bread is truly only possible because of the magic of expandex. It is a modified form of tapioca starch that was formulated to improve gluten free baking. The word Modified tends to worry people- so let me explain further. Essentially they studied tapioca and removed portions of it leaving only the parts that would allow for it to cause amazing elasticity (aka its name) in gluten free recipes. This flour allows me to get an incredible rise with everything I use it in. It traps the air bubbles in the dough just like regular flour with gluten does! Its honestly incredible. If you eat any processed or store bought foods you have eaten many forms of modified starch. Its nothing new- its just semi new to the home baker. Its non gmo and I typically get it from the brand Judee’s on amazon. Under no conditions can you sub it out for another regular starch.
Outside of the US there is a product called Ultratex 3 I have not worked with it but from what I understand its comparable! I would use that in the exact same quantity as the expandex amount that I call for.
Yeast: I recently learned about a special yeast made for sweet breads. Breads with sugar that are higher in fat have a harder time rising and typically take much longer to do so. Which means that this yeast has some extra oomph to it. Which gives me confidence that it could really benefit gluten free bread recipes. https://amzn.to/3AQPMsZ
If you don’t want to go to the trouble of getting that specific bag- any brand will do. Just make sure that its fast acting or listed as instant.
Sugar- REAL Sugar is important. Its what feeds the yeast and makes this bread possible. I do not recommend swapping in a liquid sweetener as that could throw off the recipe. Please don’t use any keto sugars or even coconut palm sugar. It may not work as well.

Gluten Free + Egg Free Italian Bread

Ingredients
Instructions
Notes
If you would like to make the bread dough 1-2 days in advance you absolutely can. I would suggest allowing it to do its two hour proof in the oiled bowl after mixing it. Then transferring it to a large well sealed Tupperware container and placing it in the fridge. You can "deflate" it before putting it into the container - don't worry it will proof up nice and big again.
Then whenever you are ready to make the bread take it out of the fridge and shape it into its two loaves. Since the dough is cold it will take more like 1 1/2 hours or so to fully proof (rather than 40 minutes which is how long it takes if the dough is warm and is doing its second proof the same day its made.)